Your jewelry deserves better than a dusty bottle of store-bought cleaner that costs twelve dollars and smells like a chemistry lab. A homemade jewelry cleaner made from three simple pantry staples can bring back the sparkle on your rings, necklaces, and bracelets in under twenty minutes. Once you see how well this works, you will wonder why you ever bought the commercial stuff.
Why You’ll Love This Recipe
This DIY jewelry cleaning solution costs almost nothing to make. You likely already have every ingredient sitting in your kitchen right now, which means no special trip to the store and no waiting for a package to arrive.
It is gentle enough to use regularly without worrying about stripping the finish off your pieces. The formula is non-toxic, so you are not soaking your rings in harsh chemicals that irritate your skin the moment you put them back on. Check out our related guide for more tips.
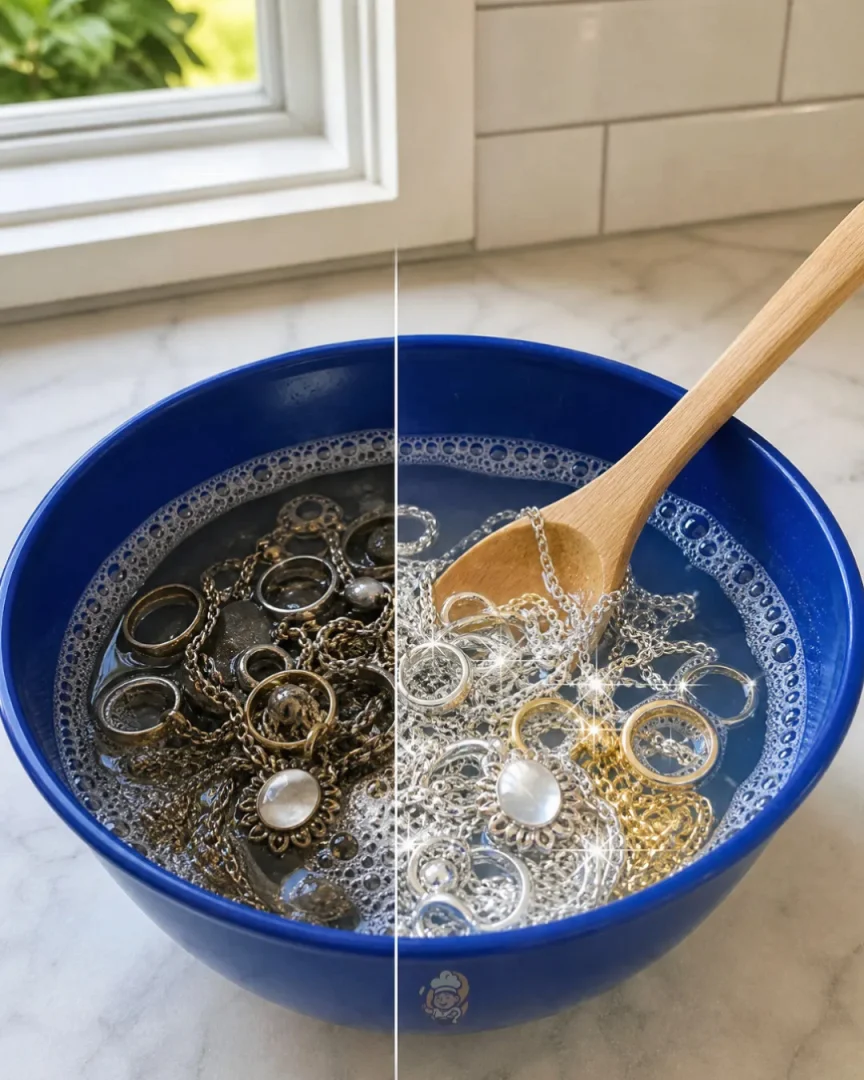
The results are genuinely impressive. Rings that looked dull and lifeless come out of the soak looking bright and clean, and the whole process is almost entirely hands-off once you mix the solution together.
This is also one of the best homemade solutions for cleaning jewelry because it works across a wide range of metals and stones. Gold, silver, platinum, and diamonds all respond well to this combination, and you can use it as often as your jewelry needs it without any risk of damage from overuse.
What Makes This Homemade Jewelry Cleaner Actually Work
The secret here is understanding what each of the three ingredients is doing. This is not just a random combination of kitchen staples thrown together. Each one plays a specific role in loosening grime, lifting tarnish, and restoring shine.
Dawn Dish Soap
Dawn is not just any dish soap, and that distinction genuinely matters here. It is formulated to cut through grease and oil without being so harsh that it damages surfaces, which is exactly what you need for a gentle jewelry cleaning solution.
The thin film of skin oils, lotion, and everyday grime that builds up on jewelry is mostly lipid-based. Dawn breaks that film apart at the molecular level, releasing it from the surface of the metal and stone so the water can carry it away. Other dish soaps can work in a pinch, but Dawn’s degreasing power is particularly effective and well-documented, which is why it remains the gold standard for this kind of cleaning.
A single tablespoon is all you need. More soap does not mean more cleaning power here — it just means more rinsing at the end to get rid of the suds.
Table Salt
Salt acts as a very mild abrasive in this solution. It helps dislodge stubborn buildup that soap and water alone might not fully remove, particularly in the tiny grooves and settings around stones where debris tends to accumulate over time.
The salt dissolves as you stir the mixture, so it never scratches the surface of your jewelry the way a coarser abrasive would. It is doing its work at a microscopic level, gently agitating the surface of the metal to help lift away oxidation and residue. This is part of what makes this an easy DIY silver cleaner as well — salt helps break the bond between tarnish and the metal surface so the soap can wash it away cleanly.
Warm Water
Warm water is the carrier that brings the other two ingredients into contact with every surface of your jewelry. It also helps open up the cleaning process by slightly loosening the bond between grime and metal before the soap and salt go to work.
The temperature matters more than you might think. Cold water does not activate the soap as effectively, and hot water can be problematic for certain stones. Warm — not hot — is the right call. Think of the temperature you would use to wash your hands comfortably, and you are in the right range.
Tips for Getting the Best Results
Let the Soak Do the Work
The ten to fifteen minute soak is not just a suggestion — it is where most of the actual cleaning happens. Resist the urge to pull your jewelry out early and start scrubbing. Give the solution time to penetrate the buildup around prongs, inside band engravings, and underneath stones where a brush cannot easily reach.
If your pieces are particularly grimy or have not been cleaned in a long time, you can let them soak for the full fifteen minutes. For lighter maintenance cleaning, ten minutes is usually plenty to restore shine to old jewelry and remove surface dullness.
Use a Soft Toothbrush Correctly
A soft-bristled toothbrush is the right tool for the job, and the emphasis on soft really does matter. Medium or firm bristles can leave fine scratches on softer metals like gold, especially on polished surfaces where those marks will catch the light.
Use light, circular strokes and work methodically around the setting of any stones. Pay particular attention to the underside of rings, where skin cells and soap residue collect in the recessed areas around prongs. The bristles can reach into spaces your fingers never could, and that is where the biggest visual difference comes from. Hold the piece over the bowl while you scrub so any loosened debris falls back into the solution rather than onto your counter.
Rinse Thoroughly
Rinsing is a step that is easy to rush, but it is worth taking your time. Any soap left behind will dry to a hazy film on the surface of your jewelry, which will undo the work you just did. Run the pieces under clean, lukewarm water for longer than feels necessary, turning them so the water reaches every angle.
If you are cleaning rings with intricate settings, a gentle stream of water directed underneath the stone can help flush out any loosened debris that the brush stirred up but did not fully remove. Be sure you are working over a closed drain or a bowl, not directly over an open sink.
Dry Properly
A microfiber cloth is the right choice for drying because it is soft enough not to scratch and absorbent enough to pull moisture out of the small crevices around stones and settings. Paper towels and regular cotton cloths leave tiny fibers behind, which defeats the purpose of all that careful rinsing.
Pat the jewelry dry rather than rubbing it aggressively. Once you have removed the bulk of the moisture, set the pieces on a clean dry cloth and let them air dry completely before storing them. Even a small amount of trapped moisture in a jewelry box can encourage tarnish to return faster than it otherwise would.
What Jewelry This Cleaner Is Safe For
This solution works beautifully on gold, silver, platinum, and diamonds. It is a reliable way to clean tarnished silver at home and to keep diamond rings looking their best between professional cleanings. Most hard gemstones — sapphires, rubies, emeralds set in standard settings — also respond well to this method.
However, there are important exceptions. Do not use this cleaner on pearls, opals, or turquoise. These materials are porous or have surface treatments that can be damaged by prolonged exposure to water and soap. Pearls in particular are extremely sensitive to any kind of chemical exposure and should only be wiped down with a damp cloth.
Glued costume jewelry is also on the no-go list. The soak can weaken or dissolve the adhesive holding stones in place, and you will end up with a bowl of loose rhinestones and a ruined necklace. When in doubt about a piece, check with a jeweler before soaking it.
Homemade Jewelry Cleaner Recipe
You’ll Need
- 1 tablespoon Dawn dish soap
- 1 tablespoon table salt
- 1 cup warm water
Directions
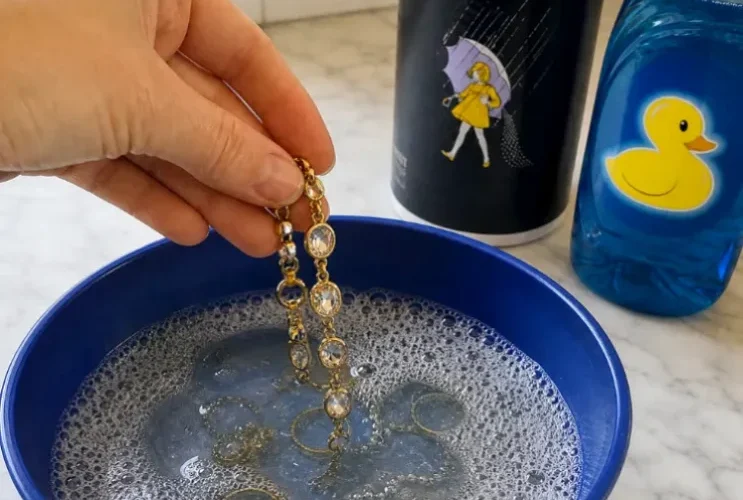
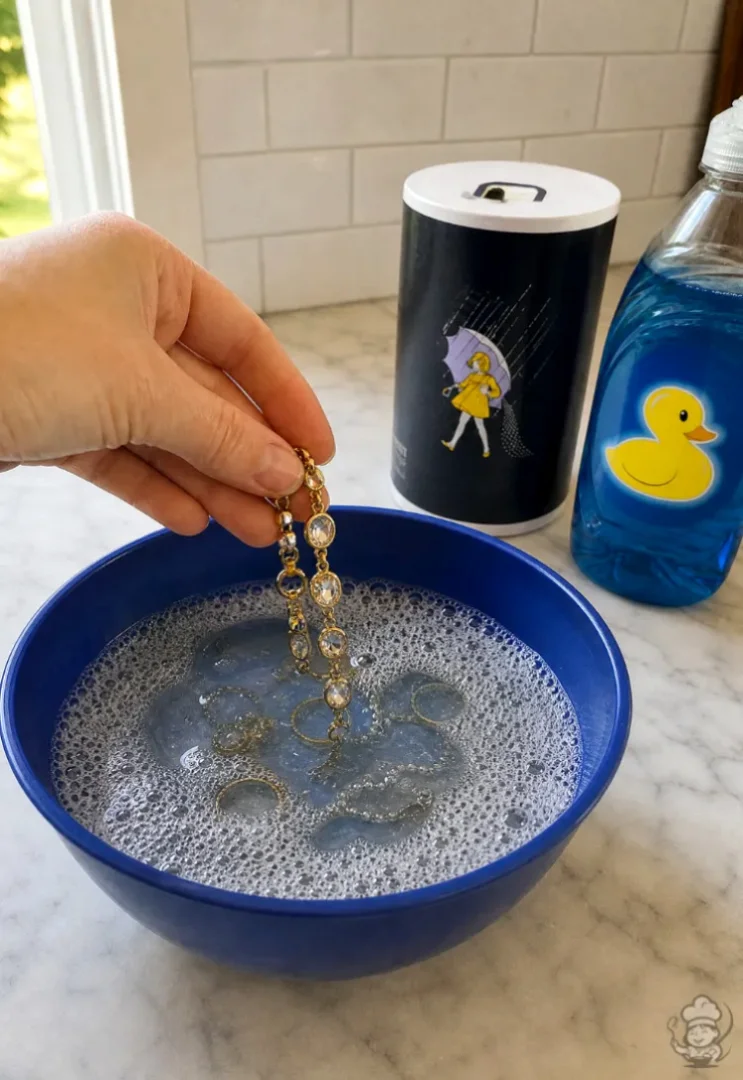
- Mix the dish soap, salt, and warm water together in a small bowl until the salt is dissolved and the ingredients are fully combined.
- Place your jewelry in the solution and let it soak for 10 to 15 minutes.
- Use a soft toothbrush to gently scrub around settings, prongs, and any detailed areas if needed.
- Rinse the jewelry thoroughly under clean lukewarm water, making sure all soap residue is removed.
- Dry with a soft microfiber cloth and allow to air dry completely before storing.
Note: Not recommended for pearls, opals, turquoise, or glued costume jewelry.
For more on caring for specific metals at home, the GIA Gem Encyclopedia is a reliable resource for understanding the properties of different stones and metals. You can also find guidance on cleaning frequency and professional care recommendations through the Jewelers of America consumer care guide.
Homemade Jewelry Cleaner
A simple, non-toxic homemade jewelry cleaning solution made from three pantry staples that brings back the sparkle on rings, necklaces, and bracelets in under twenty minutes. Works on gold, silver, platinum, and diamonds.
Ingredients
- 1 tablespoon Dawn dish soap
- 1 tablespoon table salt
- 1 cup warm water
Directions
Mix the dish soap, salt, and warm water together in a small bowl until the salt is dissolved and the ingredients are fully combined.
Place your jewelry into the solution and let it soak for 10 to 15 minutes, allowing the solution to penetrate buildup around prongs, inside band engravings, and underneath stones.
After soaking, use a soft-bristled toothbrush to gently scrub the jewelry using light, circular strokes, paying particular attention to the underside of rings and areas around stone settings.
Rinse the jewelry thoroughly under clean, lukewarm water, turning the pieces so water reaches every angle and flushes out any loosened debris.
Pat the jewelry dry with a microfiber cloth, then set the pieces on a clean dry cloth and allow them to air dry completely before storing.
Recipe Reviews
- ★★★★★
Excellent recipe!
Leave a Reply
Your email address will not be published. Required fields are marked *
One Comment